How to work with schedules
Scope of this guide
This guide is focused on working with schedules using the SAFE web application. If you want to learn about API interactions see FRMSc API documentation or Apps.
You can manage schedules through the Schedules screen.
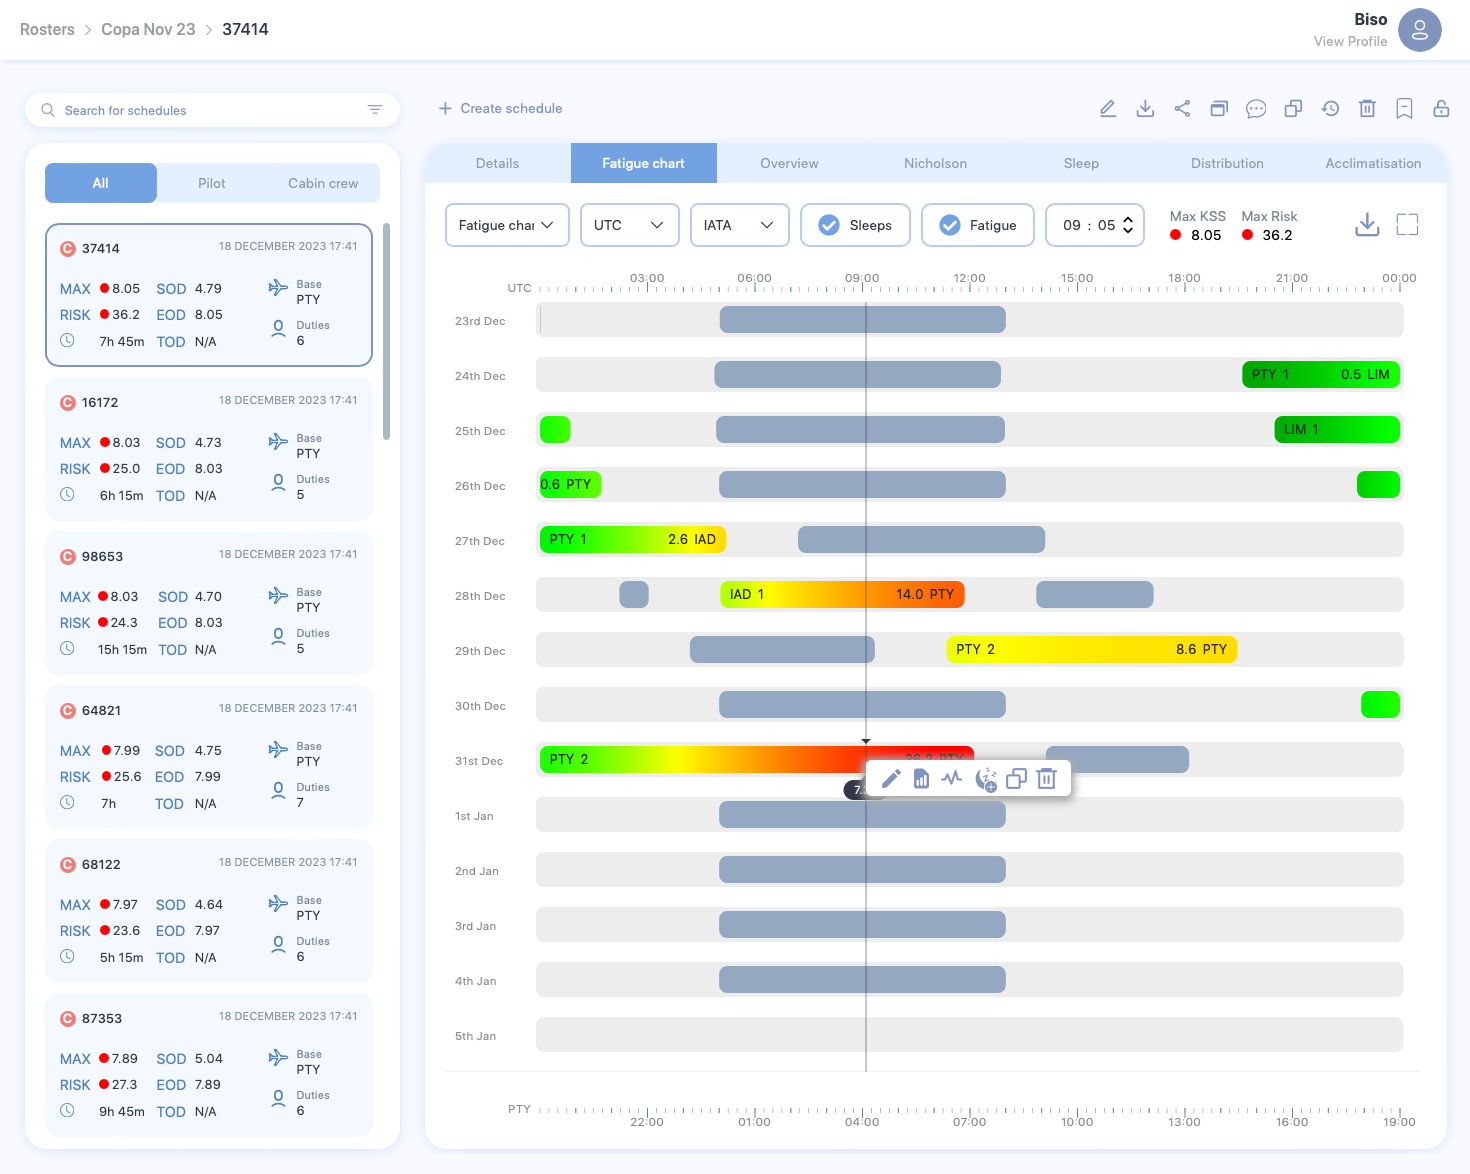
You can perform the following actions through this screen.
Create a schedule
Create manually
The workflow
Creating schedule is only a step in a larger workflow. The steps below isolate creating schedule from that workflow. The following steps demonstrate schedule creation process for users returning to create a schedule in a roster.
To learn how to create a new schedule as part of the entire workflow, see the Individual entry method in the How to load data into SAFE guide.
To create a new schedule manually:
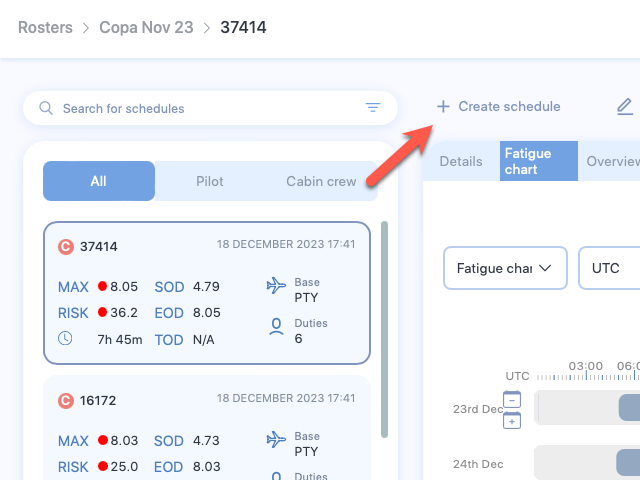
- Open schedules screen from an existing roster.
-
Click the + Create schedule button to create a new schedule.
-
The Create schedule form appears. Enter the required values to the properties shown in the form. See Schedule properties to learn more about each property shown in this screen.
- Click Submit. A new schedule will be created.
- The Create Duty form appears. You can continue adding duty to the newly created schedule, following the entire workflow or cancel the form to return to this schedule later. If you are returning to add a duty and seek a guide, see Create a duty.
Create by bulk upload
To create a roster by bulk upload method, see the Bulk upload method in How to load data into SAFE.
View a schedule
Empty schedule?
If you open an empty schedule, the Create Duty form will appear, prompting you to add a new duty to the schedule.
There are multiple ways to view or search a schedule. However, we recommend that you familiarise yourself with the schedule card first.
Schedule card
A schedule card is an item that represents a schedule in the schedule list. It shows you key details about the schedule. See below for an image of the schedule card and the description of each label (numbered) on it.
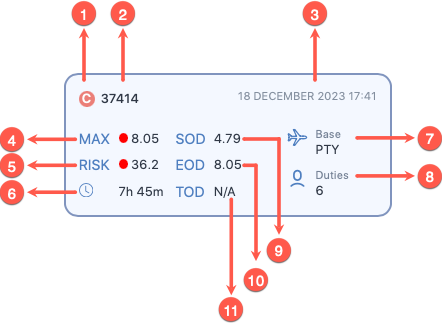
- The schedule type icon. If the schedule is a pilot, it would show a blue circle with the letter P inside it. For a cabin crew, the icon would show a red circle with the letter C inside it.
- The schedule name
- The date this schedule was uploaded or created
- The maximum fatigue score for this schedule. See the bottom of this list to learn more about the coloured circle appearing in the front of this score.
- The maximum risk score for this schedule. See the bottom of this to learn more about the coloured circle appearing in the front of this score.
- The total time this schedule rested throughout their duties.
- The short code for home base airport
- The total number of duties performed by this schedule within this entry
- The maximum fatigue score at the start of the duty
- The maximum fatigue score at the end of the duty
- The maximum fatigue score at the top of the descent
In the front of the maximum fatigue score and maximum risk score, you will see a coloured circle. The colour of this circle can change depending on the score for this schedule.
- A green dot (
 ) means the fatigue score or the risk score is within the set threshold for this schedule
 - A yellow dot (
 ) means the fatigue score or the risk score is nearing the set threshold for this schedule
 - A red dot (
 ) means the fatigue score or the risk score has exceeded the set threshold for this schedule
Simple search
Type the schedule name in the Schedules screen's search bar to search for a schedule. Then, click on the card associated with the schedule to open it and view its details.
Advanced search
You can perform an advanced search on your schedule list. To perform an advanced search:
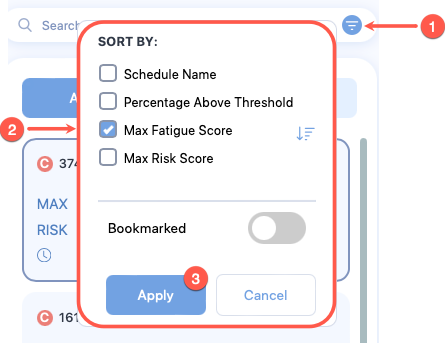
- Click the Advanced Search icon at the end of the search bar.
- Search options appear that allow you to make search adjustments. See the Advanced search properties below for more information on each property.
- Click Apply.
- Click on the card associated with the schedule to open it and view its details.
Scroll schedule list
You can also scroll through the list of schedules to find a schedule. Click on the card associated with the schedule to open it and view its details.
You can also use the easy-filter buttons below the search bar to limit the number of schedules appearing on the list. These buttons let you filter the schedules by their types.
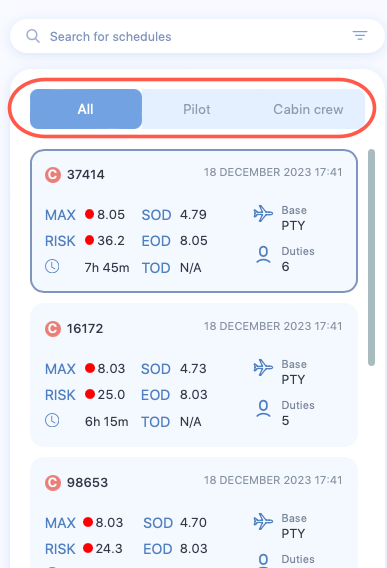
- If you click All, all schedules regardless of their types are listed in the schedule list.
- If you click Pilot, only pilots are listed in the schedule list.
- If you click Cabin crew, only cabin crew are listed in the schedule list.
Share a schedule
You can share private and public schedules, individually. You can share a schedule with colleagues in the same organisation, SAFE and CARE licencees in different organisations, and individuals, who are outside your organisation, without SAFE and CARE licence.
If you share a schedule, private or public, with someone within your organisation or SAFE and CARE licencees in different organisations, they will get a copy of the schedule, which they will own. They can't edit the original but they can edit the copy.
A recipient who is neither a licenced user of SAFE and CARE nor a colleague, they can only view but not edit the copy of the schedule. To help you understand these restrictions, we have prepared a schedule share matrix (shown below).

Schedule analysis
See Schedule to learn more.
Edit a schedule
See Schedule control bar to learn how.
Delete a schedule
See Schedule control bar to learn how.
Access the schedule control bar
Access control
Only the user who locked a schedule can unlock the schedule, except for administrators.
The schedule control bar appears on top right of each open schedule. Like the roster control bar, this control bar features a rich set of icons that control various functionalities related to the schedule.

- The Edit icon lets you edit the schedule properties. See Schedule properties for a list of properties that you can edit.
- The Download icon lets you download the schedule analyses. If you click on this icon, the Download Schedule box appears which lets you choose the format of the files that you want to download. Upon continuing, a folder containing multiple files is downloaded. These files will contain the following data.
- Activities
- Alertness based on Karolinska Sleepiness Scale
- Alertness based on Samn Perelli scale
- Alertness summary
- Last sector's fatigue scores at the top of the descent
- Schedule data
- Sleep periods
- Time in duty
- The Share icon lets you share the schedule with people in your company. If your company administrator has enabled sharing externally for you, you can also send the schedule analyses in an email to the people outside of your company. See Share a schedule for more information.
-
The Copy icon lets you create a duplicate of this schedule. If you click on this icon, the Copy Schedule box appears. You need to change the title of the Schedule and click Copy to create a duplicate schedule.
How to copy a schedule?
-
The Comment icon lets you add a comment to the open schedule. If you click on this icon, the Comment box appears which lets you view existing comments in the schedule or add a new comment in the schedule.
-
The History icon lets you view a list of changes made to the schedule and undo those changes.
- Click this icon to open the Schedule Version History box.
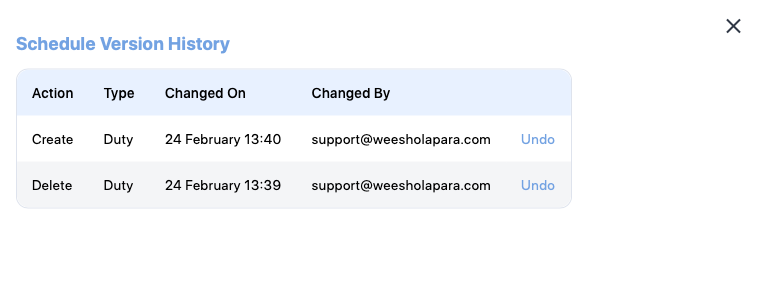
- This box lists all changes made to this schedule. An Undo link also appears at the end of each item.
- Click on the link to remove that change. The Schedule analysis screen refreshes and removes the change from the schedule.
- Click this icon to open the Schedule Version History box.
-
The Delete icon lets you remove the schedule from the roster. If you click on this icon, you will be prompted to confirm your action. If you confirm the delete action, the schedule will be deleted from your instance and the schedule list will refresh to remove the schedule.
- The Bookmark icon attaches a small bookmark icon on top of this schedule's card. You can view the icon on top of this schedule's card when you search for this schedule. Bookmarking a schedule lets you search the roster using the Advanced search.
- The Lock icon lets you control any new changes to this schedule. If you click on this icon, a lock will be placed disabling anyone to change the schedule. After a lock is placed, this icon will be replaced by the Unlock icon. If you click on the Unlock icon, the schedule can be changed.
Table of properties
Schedule properties

| Property (* required) |
Description |
|---|---|
| Name* | The name of the schedule. Usually the name of the pilot or the crew member. |
| Rank | A label for indicating the rank of the pilot or the crew member. |
| Base Airport* | The homebase airport of the pilot or the crew member. Click on the airport name to view a text box. Type ICAO, IATA, or FAA airport codes in the text box and choose the airport from the drop down. |
| Preparation time | The time required to prepare after waking from a main sleep. |
| Crew Type* | The type of personnel. Choose between Pilot or Cabin crew. |
Advanced search properties
| Property controls | Property | Description |
|---|---|---|
| Sorting | Schedule Name | Check this box to sort the schedules by their names. You can also see descending sort (  ) or ascending sort ( ) or ascending sort ( ) icons next to the Schedule Name property. Click on these icons to toggle between ascending or descending sort. ) icons next to the Schedule Name property. Click on these icons to toggle between ascending or descending sort. |
| Percentage Above Threshold | Check this box to sort the schedules by their percentage above threshold value. You can also see descending sort ( ) or ascending sort () icons next to the Percentage Above Threshold property. Click on these icons to toggle between ascending or descending sort. |
|
| Max Fatigue Score | Check this box to sort the schedules by their maximum fatigue scores. It is the default sorting option. You can also see descending sort ( ) or ascending sort () icons next to the Max Fatigue Score property. Click on these icons to toggle between ascending or descending sort. |
|
| Max Risk Score | Check this box to sort the schedules by their maximum risk scores. You can also see descending sort ( ) or ascending sort () icons next to the Max Risk Score property. Click on these icons to toggle between ascending or descending sort. |
|
| Schedule visibility | Bookmarked | Enable this property to only show bookmarked schedules. |