Settings
Saved your changes?
Settings screen must be used with caution. If you want to save the changes you have made, click on the Save button that appears underneath the tab where you have made your changes. Changing a property underneath a tab and clicking the Save button underneath a different tab won't save your changes.
To open this screen, click on the gear () icon at the bottom of the menu panel in the SAFE web application.
The Settings screen allows you, the user or the administrator or the company administrator, to change the fundamental behaviour of the SAFE application. Using this screen you can change default values of most of the properties you will find in the SAFE application according to your role. This screen comes with 5 different tabs. In this guide, we will look at the functionality tied to each of these tabs.
Preferences
The Preferences tab is as straightforward as it can get. It allows any user to change their default display options and also manage when they want to receive email notification from us. See the table below for more details on properties available under this tab.
| Property | Description |
|---|---|
| Default Time References | This dropdown lets you choose the default time zone SAFE application must use to show time entries. Choose either UTC, Base time, or Local time. |
| Default Airport Code | This dropdown lets you choose the default format for the airport codes shown in the application. Choose either IATA, ICAO, or FAA. Not all airports have codes allocated to them. If the code is missing, no code will be displayed. |
| Default create roster visibility | This dropdown lets you choose the default visibility option that should be selected when you are creating a new roster. Choose either Public or Private.
|
| Show sleeps | This dropdown lets you choose whether to show the sleep data or hide it. Choose either Show sleeps or Hide sleeps. |
| Show fatigue | This dropdown lets you choose whether to show the fatigue data or hide it. Choose either Show fatigue or Hide fatigue. |
| Show risk | This dropdown lets you choose whether to show the Duty Risk Metric data or hide it. Choose either Show risk or Hide risk. |
| Email on Roster Upload Success | This dropdown lets you choose whether to send email notification to you after a roster is successfully uploaded to SAFE application. Choose either Send email or Do not send email. |
| Email on Roster Upload Failure | This dropdown lets you choose whether to send email notification to you if a roster could not be uploaded to SAFE application. Choose either Send email or Do not send email. |
| Email on Roster Shared | This dropdown lets you choose whether to send email notification to you when your roster is shared with anyone. Choose either Send email or Do not send email. |
Administrator Settings
Only the Company Administrator can see the Administrator Settings tab. This tab has different sections that allow you to fine-tune the application’s behaviour. Explore the tabs below for more details on properties available for each section under Administrator Settings tab.
| Property | Description |
|---|---|
| Roster Visibility | Use this dropdown to set the visibility of the uploaded roster.
|
| Date Format | Use this dropdown to select the default date format for uploaded roster. Choose between:
If the uploaded roster has dates in a different format, SAFE application will see it as an upload error. |
| Base Airport | Use this property to set the base airport for your airline. If the control is showing an airport:
|
| Preferred Scale | Use this property to set the default scale that should be used to show alertness. See below for a video demonstration. Choose between:
|
| Pilot Threshold | Use this property to change the scale threshold for pilots. You can change the value of this property by adjusting the slider control left or right. We recommend that you use SP scale and set the Pilot Threshold to 5.0. |
| Cabin Crew Threshold | Use this property to change the scale threshold for cabin crew. You can change the value of this property by adjusting the slider control left or right. We recommend that you use SP scale and set the Cabin Crew Threshold to 5.5. |
| Insert rest into multi-sector augmented duty | Use this property to set automatic sleep value for aircrew flying multiple sectors. Choose:
|
| Default Schedule Preparation Time | Use this property to select the default preparation time for the crew. |
| Default Duty Commute Time | Use this property to select the default duty commute time for the crew. See below for a video demonstration. |
| Default Cabin Crew Sleep Pattern | Use this property to select the default cabin crew sleep pattern for normal long haul and ultra long haul (ULR) flights. Choose either:
See Cabin Crew Sleep Pattern to learn more. |
| Default Upload Format | Use this property to set the default format for the CSV or XLSX file you want to upload to the SAFE application. The file format of your choice will be translated to SAFE and CARE format automatically. Choose one option from the following to prescribe the upload format to the SAFE application:
If your Crew Management System is not included in this list, please email info@frmsc.com for assistance to create the connectivity option.
|
How to change alertness scale?
How to change commute times?
| Property | Description |
|---|---|
| Basic Field Upload | Use this property to accept (or ignore) In-Duty Rest and Partial augmentation properties. If this property is checked, partial augmentation and in-duty rest values will be ignored. |
| Upload Error Handling | Use this dropdown to select the action SAFE application must take if the upload has errors. Choose either:
|
| Property | Description |
|---|---|
| Date Range to Purge | Use this dropdown to delete roster analysis that are past a certain age. You can choose from different time intervals, such as 1 day, 2 days, 30 days, 60 days, or 365 days. Analyses that are older than the selected value will be removed from the application by an automatic process that runs at night. You can turn this functionality off by choosing the Off option from the dropdown. |
| User's Data to Purge (Optional) | Use this property to delete only the uploads of specific user(s).
|
| Property | Description |
|---|---|
| Duties in system | The total number of duties held by this instance of the application. |
| Limit | The total number of duties this instance of the application can hold. If you want to increase this limit, contact us at info@frmsc.com.
If the number of duties in this instance has reached the instance limit, you will not be able to process new duties. You could delete old duties or archive them as a workaround, if you would like to continue processing new duties without increasing the instance limit. However, archived duties can't be analysed or processed.
|
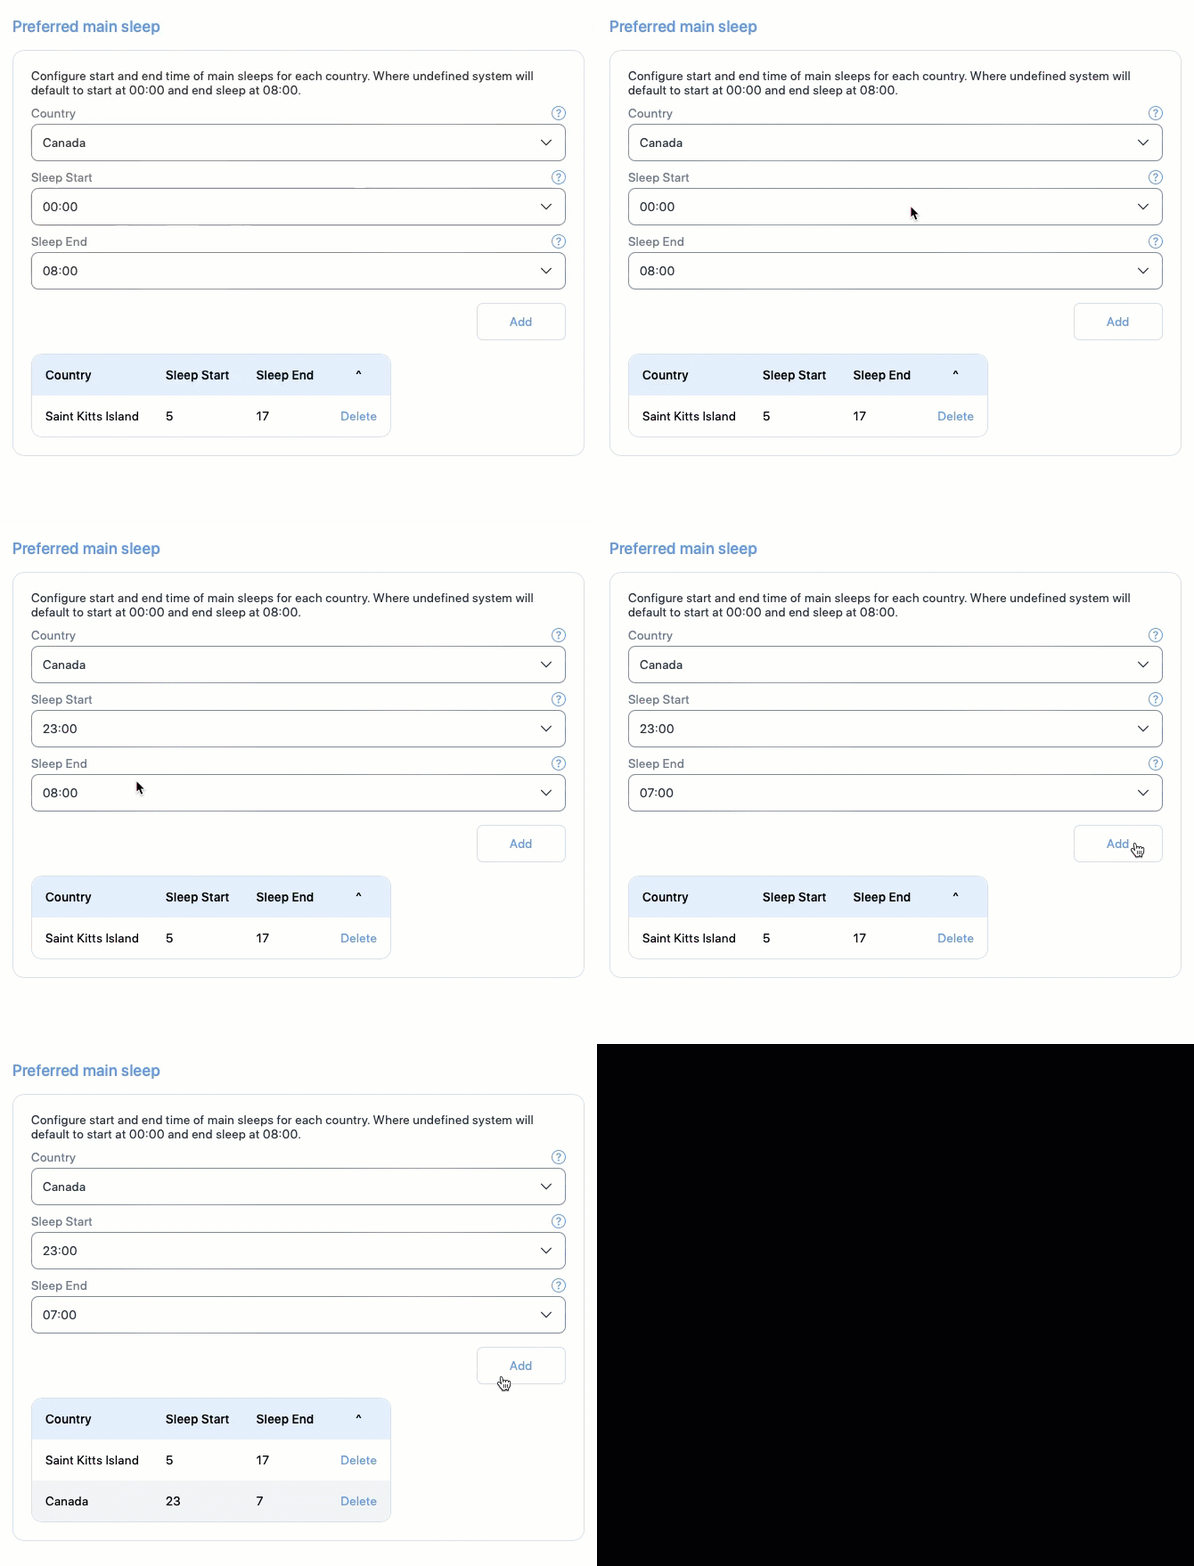
This section lets you configure the preferred start and the end times of main sleeps for each country. This configuration should usually be based on the sleep times of a normal resident of the country. If any country is unconfigured, the default sleep start time will be midnight and default sleep end time will be 08:00.
| Property | Description |
|---|---|
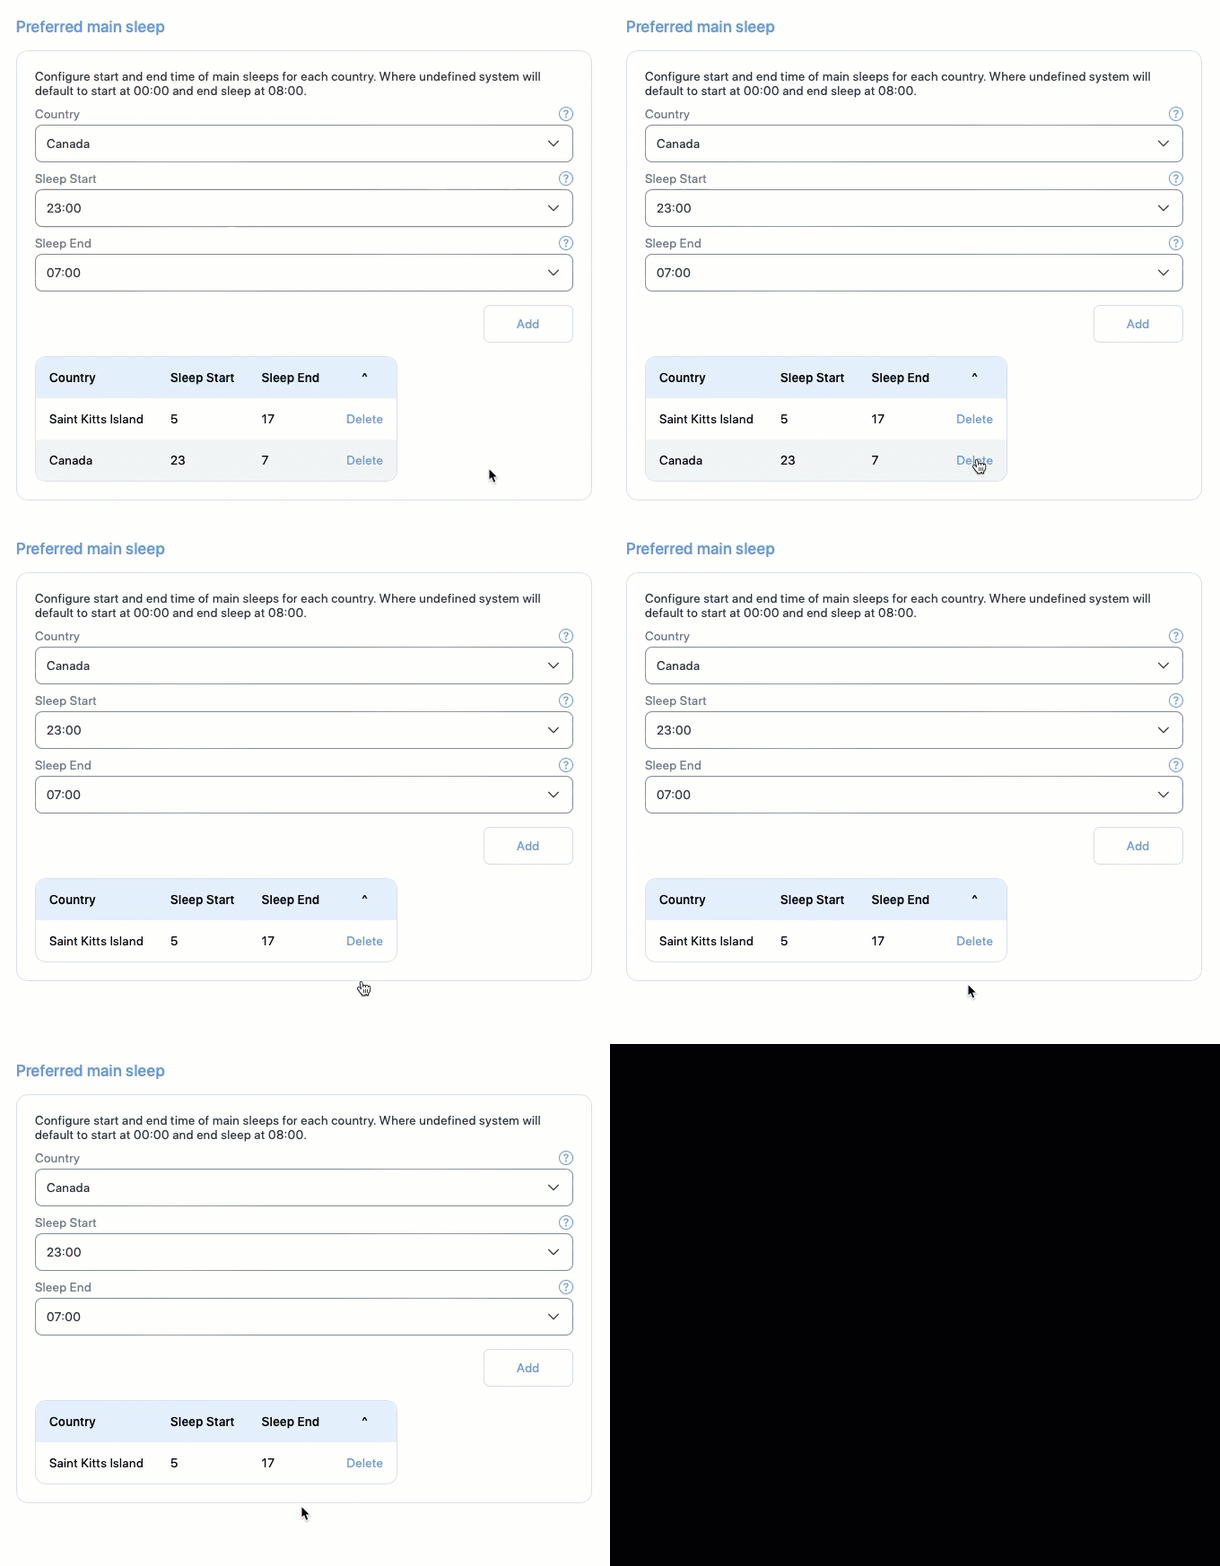
| Country | Use this dropdown to select the country, which you want to configure the sleep times for. There is no limit on the number of countries you can configure. However, if the sleep time is already configured for the selected country, you can't edit it. You must delete the configuration and add the configuration with new settings. |
| Sleep Start | Use this dropdown to select the default sleep start time for the selected country. |
| Sleep End | Use this dropdown to select the default sleep end time for the selected country. |
This section also features two buttons.
| Button | Description |
|---|---|
| Add | Use this button to store your sleep configuration for the selected country. Click this button to add the country’s sleep configuration to the list at the bottom of this section. 
|
| Delete | Use this button to delete the sleep configuration. Click this button to delete the sleep configuration for the country on the left of this button.
|
Company Settings
Like Administrator Settings, only the Company Administrator can see the Company Settings screen. The properties you see in this page are focused on managing login and user session behaviour. See the table below to learn more about each property.
| Property | Description |
|---|---|
| Remember me enabled | Use this property to enable or disable the Remember me checkbox you will see in the login screen. If toggled on, the Remember me checkbox will appear in the login screen. |
| Log on warning message | Use this property to show a message to each user upon successful login. Type in the message you want show. If left blank, the warning message screen will not appear.
Use caution when enabling this message as it can disorient your users. Only enable this feature, if you are trying to share important information to the users.
|
| Account suspension active | Use this property to decide whether to suspend an account after a certain number of failed login attempts. Toggle this property on to enable suspension. You can set the threshold for failed attempts below. |
| Suspend user account days | Use this property to set the number of days a user can remain inactive before their account is automatically suspended. |
| Maximum login attempts | Use this property to specify the threshold for failed login attempts. This property works in conjunction with Account suspension active property. |
| Lockout suspension days | Use this property to set the number of days a suspended user will be locked out before they can attempt to login again. |
| Two Factor Enabled | Use this property to enable or disable two factor authentication (2FA). If enabled, users must use the code received in their email to validate their account before accessing the system. |
| Saml SSO Enabled | Use this property to enable or disable SAML Single Sign On feature. When you toggle this property on, you will see a list of the following additional properties you must set to start using SAML Single Sign On.
|
User Management
Only administrators can see the User Management screen. The properties you see in this page are focused on managing users in your company. There are a few actions you can take using this screen. You can learn about them in How to manage users
API
Most users can see this screen, however this screen is designed solely to get keys required to use SAFE APIs. You can learn more about FRMSc SAFE APIs in our developer documentation.